• Can't post after logging to the forum for the first time... Try Again - If you can't post in the forum, sign out of both the membership site and the forum and log in again. Make sure your COG membership is active and your browser allow cookies. If you still can't post, contact the COG IT guy at IT@Concours.org.
  • IF YOU GET 404 ERROR: This may be due to using a link in a post from prior to the web migration. Content was brought over from the old forum as is, but the links may be in error. If the link contains "cog-online.org" it is an old link and will not work.

Question about "City Duty" on a C10

x01660

On a Connie in a neighborhood near you
Member
Good morning, everyone!

I just got my C10 3 days ago, and I've already put around 200 miles on it. Its a FANTASTIC motorcycle, and handles slow speeds and fast speeds equally as well.

While I've read ad infinitum about how amazing these machines are over LONG distances, I haven't really seen (probably just me) anything about a lot of stop and go in traffic; I go out daily and do DoorDash around D.C. (so I get to get paid while riding instead of paying!) after I'm done with work for the day, and I'm wondering if there are things that I need to look out for when subjecting it to severe service like that.

Is the starter ok with constant on and off? Should I increase my oil change interval or valve adjustment interval, etc? What tips, tricks, things I should be looking out for, etc. when I'm using the bike like that? Its about 3-4 hours, 6 days a week.

Thanks!

-x01660
 
Do your usual maintenance and ride it. These are tough machines. I'd work on heat reduction to the rider for summer or go half naked. Heat reduction by covering the exposed areas around the carbs. Flaps in front of the side fairing openings to help pull heat out and away. Baker air wings or something similar that you fabricate. Pull all the inner heat shields in the winter and plug some lower fairing holes and it goes a long way to keep you warm. HTH
 
Do your usual maintenance and ride it. These are tough machines. I'd work on heat reduction to the rider for summer or go half naked. Heat reduction by covering the exposed areas around the carbs. Flaps in front of the side fairing openings to help pull heat out and away. Baker air wings or something similar that you fabricate. Pull all the inner heat shields in the winter and plug some lower fairing holes and it goes a long way to keep you warm. HTH
Previous owner already made those fabrications. They're already installed. And yes. This bike puts off a LOT of heat. But its ok. I'm used to ATGATT in CA Central Valley summer heat, so I'm good.

Great to know! Thanks!

-x01660
 
I hate it when Bud gets it right, but I agree with him. Normal maintenance should be fine.
(Please don't tell anyone I sed that)

Because this is used for a business; I'd consider some improvements/modifications.
Would be good to do because of all the stop and go traffic of DC.

Maybe;
Add a switch and relay to the fan so that you can run the fan continuously if needed.
NOTE: The switch also gives you an emergency back-up if the fan thermostat/switch goes out.

As the bike is getting older, I'd inspect all the hose's and "replace" the lower hoses. (near the left header pipe).

(Assuming you're regularly hauling some load)
I'd stiffen up and renew the suspension a bit.
** I'd go to 50* in the rear shock and stiffer (or shorten) the front springs.
,,,,,,, I'd also change the fork oil and/or add emulators to improve the ride.

Oh, almost forgot; I'd add Steve's 2 minute Jett kit for better torque/smother running at low speeds, and have stand pipes installed in the carbs to prevent possible hydro-lock.

Ride safe, Ted
 
Last edited:
I hate it when Bud gets it right, but I agree with him. Normal maintenance should be fine.
(Please don't tell anyone I sed that)

Because this is used for a business; I'd consider some improvements/modifications.
Would be good to do because of all the stop and go traffic of DC.

Maybe;
Add a switch and relay to the fan so that you can run the fan continuously if needed.
NOTE: The switch also gives you an emergency back-up if the fan thermostat/switch goes out.

As the bike is getting older, I'd inspect all the hose's and "replace" the lower hoses. (near the left header pipe).

(Assuming you're regularly hauling some load)
I'd stiffen up and renew the suspension a bit.
** I'd go to 50* in the rear shock and stiffer (or shorten) the front springs.
,,,,,,, I'd also change the fork oil and/or add emulators to improve the ride.

Oh, almost forgot; I'd add Steve's 2 minute Jett kit for better torque/smother running at low speeds, and have stand pipes installed in the carbs to prevent possible hydro-lock.

Ride safe, Ted

Thanks for this info, Ted.

I mentioned in my welcome post that this bike was owned by a COG member. The carbs were sent to (I think Steve?) Florida, and had some valves put in to prevent hydrolock. Has highway bars, a vacuum operated cruise, a lowering kit, plus a STACK of service records. The throttle operates like a rheostat, and I press the start button once and it fires up immediately. No flat spots AT ALL all the way through the rev range.

I'll go through and check the hoses, and I wanted to ask about the suspension setup; I'm 6'2", 280-300lbs. And I will be riding with a 160 lb passenger a bit less often than not. With that in mind, what would your recommendations for suspension preload and/or replacement parts be?

Y'all are great!

-x01660
 
Tall and heavy makes it difficult;
This is my opinion only. Others can offer more/better.

(I'll assume you don't want to spend megabucks on new aftermarket/best)?
Not sure of your mechanical capabilities/facilities?
Not sure what spring is in the front of your bike now?
Not sure what Lowering Kit you have?

Start with; remove lowering kit Links and install stock Links.
Stock suspension: Put 50 PSI of air in the rear shock / dampener at middle setting and tighten the front pre-load down as far as possible.
Bike will do better but will nosedive during hard braking.

Front; (after you find out what springs are in the bike) Change to stiffer front springs or, pull the stock springs / cut off 5" of the tightly wound coils and install a 5' long spacer.
Better; Add an Emulator or Gold valve to the front to get a better ride.
 
Last edited:
Better Rear.
Rear: Change the rear shock. ZZR-1100 or 1200 will fit and give stock seat height.
Spring is probably too soft for your weight but will do ok if set to max pre-load.
(See front notes)

Or change to a ZG-1400 Rear shock. Seat height will be about 1" taller than stock. (Should be ok with your height.
Set to almost max pre-load. (22 clicks)
(See front notes)
Install a Norm Soucy Lowering Rocker to get seat height to be correct.
(It's danged hard to find a Lowering Rocker but worth a try)
Or maybe; use your lowering kit to set rear height.
 
(Assuming you don't want to spend megabucks on new aftermarket/best)?
Not sure of your mechanical capabilities/facilities?
Not sure what spring is in the front of your bike now?
Not sure what Lowering Kit you have?

Start with; remove lowering kit Links and install stock Links.
Stock suspension: Put 50 PSI of air in the rear shock / dampener at middle setting and tighten the front pre-load down as far as possible.
Bike will do better but will nosedive during hard braking.

Front; (after you find out what springs are in the bike) Change to stiffer front springs or, pull the stock springs / cut off 5" of the tightly wound coils and install a 5' long spacer.
Better; Add an Emulator or Gold valve to the front to get a better ride.

Mechanical skills? I currently have a 99 Vulcan 800, and in the past 2 months I've:

  • Valve adjustment (shim under bucket)
  • Replaced: Handlebars, CDI (determined it was bad by resistance testing using the pinout in the factory service manual), coils, igniter relay, radiator, coolant temp sensor, rear sprocket (twice-got a 43 tooth, then a 38), chain, rear brake cable (drum brake) both tires, front brakes, oil.
  • Upgraded to WOLO horn (with relay)
  • Upgraded to an LED headlight
  • Wired LED aux lights to my high beams
For facilities, not much. I work on the street, and my buddy has a motorcycle ramp that sits outside (has his bike on it. 1000 lb capacity)

I'll have to check to see about the springs in the forks as well as what lowering kit (I'll check this stack of records I got from the previous owner, and I'll reach out to him).

For money, I'm willing to spend the money (as long as it relatively reasonable- don't wanna spend $1500 on a rear spring unless its REALLY worth it). I plan on keeping this bike until she dies on me, and I have no qualms about investing more in a bike than its worth. I spend TOO much time in the saddle to worry about that. I want performance and comfort.

Does that info help at all?

Thanks!

-x01660
 
Last edited:
Better Rear.
Rear: Change the rear shock. ZZR-1100 or 1200 will fit and give stock seat height.
Spring is probably too soft for your weight but will do ok if set to max pre-load.
(See front notes)

Or change to a ZG-1400 Rear shock. Seat height will be about 1" taller than stock. (Should be ok with your height.
Set to almost max pre-load. (22 clicks)
(See front notes)
Install a Norm Soucy Lowering Rocker to get seat height to be correct.
(It's danged hard to find a Lowering Rocker but worth a try)
Or maybe; use your lowering kit to set rear height.

I'd be willing to get rid of the lowering kit; how it is right now, I can flat foot both feet with a reasonable bend in both knees. I have a long inseam and short torso, so most of my height is legs.

Does that change things?

Thanks!

-x01660
 
Yes that helps. Tall/long legs. Able to do maintenance. No garage.

What year is the bike??

On the lowering Kit, I suspect it is a Soupy's adjustable link.
If not, the prior owner may have installed a Lowering Rocker, and that is a lot better.
Start with; Remove the lowering kit/install stock Links/increase rear pressure to 50 PSI/raise the front end at the triple tree. All would be relatively EZ to do on the street (with help).

After we discover what lowering kit you have, will determine other options.
But I think the C-14 shock the better choice.

On the spring/fork/rear shock; they are not a direct bolt on. Needs some components made or modified.
Not having a shop/garage/more tools can be an issue.

Others? Please let us know if you know better than what I suggest.

Ride safe, Ted
Its an 05.

Let me get that info about what's on it (probably this weekend), and I'll respond to this post.

And I'm ok with relatively "sloppy" (is that the word?) handling. My DR for 5 years (also my other bike-and baby) was a '83 GS1100E. And I rode that thing across states (CA and NV). So I'm not expecting C14 or Multistrada levels of handling.

Thanks!

-x01660
 
This is from an old discussion. If you have an air compressor (??), EZ to do.

Believe it or not, the best way to set the pressure in a C-10 is to use an air compressor. <S__t starter grin> šŸ˜œ

(Waiting for the OMGawds's and Arghhhs to stop, and the "you're going to over pressure it" comments to fade away).

Step 1; Buy a pressure cheap regulator with gage. (Or (if you have one) use the one on the compressor)
Step 2: Install the pressure regulator into the air line.
Step 3: Put an air chuck at the end of the hose.
Step 4: Set the pressure at the desired pressure you want, plus 5 lbs. (ie; If you want 40, set reg at 45 / etc)
Step 5; Put air into the shock thru the shock fill port until all air flow stops.
Step 6: ""Rapidly"" remove air chuck from the shock fill port.
Step 7: Put everything up and go for a ride.

* The reason this works; The pressure regulator assures that you "cannot" put too much pressure in and you "can" easily set the Regulator for whatever pressure you want.
** The reason you set it at 5 psi over your desired pressure; When you remove the chuck from the shock fill port you "will lose" about 5 psi from the shock. (Some experimentation will be required)

Let the FLAMES begin...
Ride safe, Ted
 
Oh. One last thing:

Bike has a Rifle windshield on it. And sitting upright, I get wind RIGHT in my face. Above 65, and the wind blows my visor shut.

Any ideas on how to solve that?

-x01660
 
It needs a spoiler up top. Taller shield on a rifle in my experience just puts the shield up in one's face. If I had to use a rifle, it would be a shorter screen with a spoiler on top. Otherwise buy a madstad if you can find one.
 
It needs a spoiler up top. Taller shield on a rifle in my experience just puts the shield up in one's face. If I had to use a rifle, it would be a shorter screen with a spoiler on top. Otherwise buy a madstad if you can find one.
Yeah, that would absolutely do the trick; I'm assuming I can buy a spoiler to put on there? This is my first bike with farkles; I'm used to pretty bare bones, lol.

Thanks!

-x01660
 
Back when I had my c10, I had 2 rifle screens 1 taller and not times for winter(colder) riding and a shorter tinted one for Warmer riding. Worked well for me, but im only 5'10". Not certain if the still offer up different screen sizes...
 
This is from an old discussion. If you have an air compressor (??), EZ to do.

Believe it or not, the best way to set the pressure in a C-10 is to use an air compressor. <S__t starter grin> šŸ˜œ

(Waiting for the OMGawds's and Arghhhs to stop, and the "you're going to over pressure it" comments to fade away).

Step 1; Buy a pressure cheap regulator with gage. (Or (if you have one) use the one on the compressor)
Step 2: Install the pressure regulator into the air line.
Step 3: Put an air chuck at the end of the hose.
Step 4: Set the pressure at the desired pressure you want, plus 5 lbs. (ie; If you want 40, set reg at 45 / etc)
Step 5; Put air into the shock thru the shock fill port until all air flow stops.
Step 6: ""Rapidly"" remove air chuck from the shock fill port.
Step 7: Put everything up and go for a ride.

* The reason this works; The pressure regulator assures that you "cannot" put too much pressure in and you "can" easily set the Regulator for whatever pressure you want.
** The reason you set it at 5 psi over your desired pressure; When you remove the chuck from the shock fill port you "will lose" about 5 psi from the shock. (Some experimentation will be required)

Let the FLAMES begin...
Ride safe, Ted

So yeah. I have a tire pump that you set the PSI, and it pumps it to that PSI and stops. Also has a gauge on it. So is that "safe" to use, or do I still need to put an inline pressure regulator in there?

-x01660
 
Maybe.
Assuming it stops at the correct pressure, I agreed that it would supply air to the bike.
The question is; how would you attach/remove the hose from the fitting on the bike?

Reason this is important.
The shock has very little volume, so you have to remove the hose from the fitting "very quickly" to prevent loss of air pressure in the shock.
ie; Does the air-chuck on your pump hose, screw onto the bikes fitting?
If yes, it will loose too much air when you remove it.
 
Last edited:
Hello again! So I asked the PO about the lowering kit, and he said he doesn't know who did it. That said, I think I'll keep it lowered; I almost joined CDA today while getting gas.... she's a ponderously big girl!!

That said, WOW!! I did 210 miles today, 2 up. Mix of traffic, 20 miles @ 85 mph, slow speeds, etc. And I got 40 MPG!!!!

I'm a fan.

šŸ˜Ž

-x01660
 
Glad ur getting use to her. That 7 1/2 gal of fuel she carries doesn't help keeping her from going down either.
 
Quick bump so I don't start a new thread:

Underneath the rear cowl, where the luggage rack goes, there are these 4 metal inserts that go in the bolt holes. What are those things called, and where can I get them? If anyone has some, let me know. I need a set.

Thanks!

-x01660
 
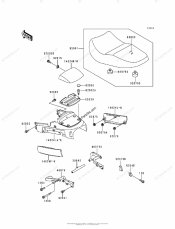
Is this the area ur looking for parts for? This is from partszilla.
 

Attachments

  • MjA0OTk0Nw-b5e7fbef.png
    MjA0OTk0Nw-b5e7fbef.png
    400.1 KB · Views: 49
Collars can be used to avoid breaking the plastic. Looks like kaw used shoulder bolts there instead.
 
Top