• Can't post after logging to the forum for the first time... Try Again - If you can't post in the forum, sign out of both the membership site and the forum and log in again. Make sure your COG membership is active and your browser allow cookies. If you still can't post, contact the COG IT guy at IT@Concours.org.
  • IF YOU GET 404 ERROR: This may be due to using a link in a post from prior to the web migration. Content was brought over from the old forum as is, but the links may be in error. If the link contains "cog-online.org" it is an old link and will not work.

What have you done to your _______(insert other bike here) today?

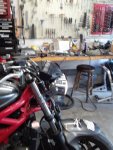
was over 50 today, normal average is 30, so opened the garage.

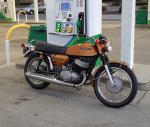
Friends 1974 RD-200A, fired it up to run more good gas through, tried to adjust idle, ran it through the gears. Better.
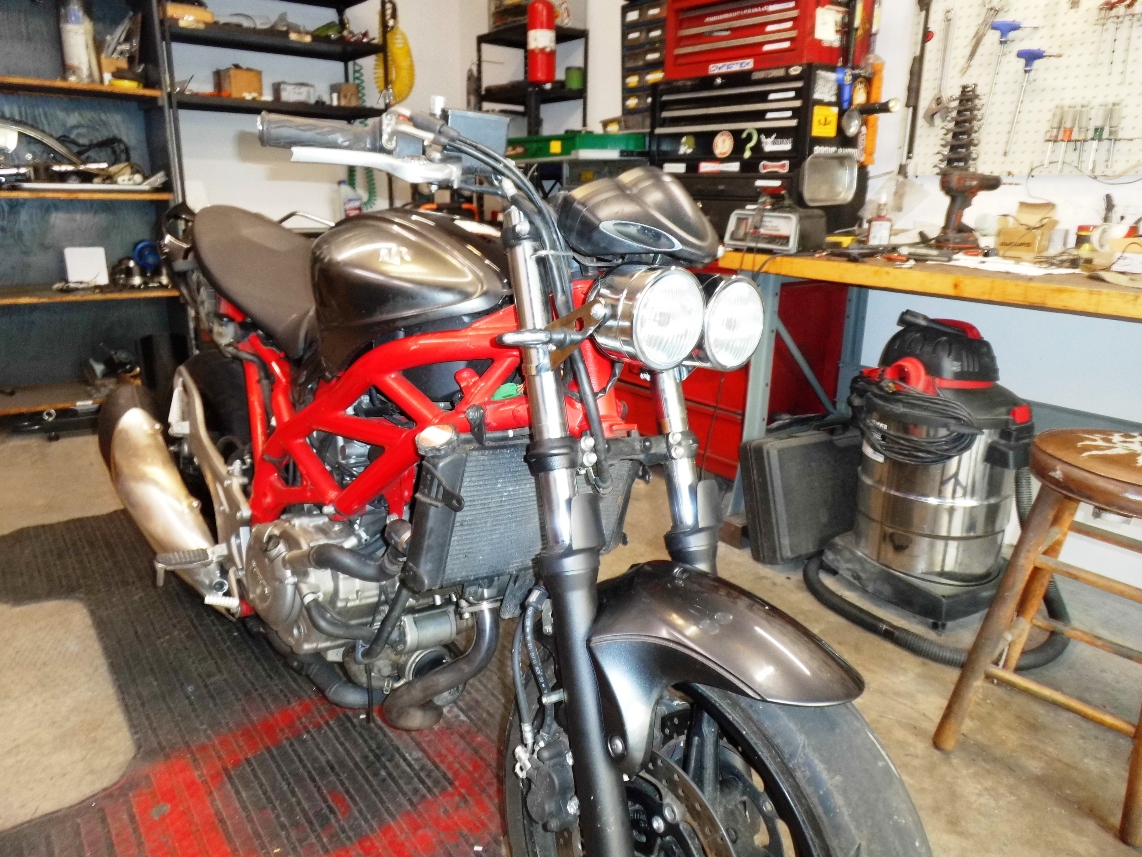
1999 TW-200, still trying to sort out the idle, back to mostly stock but getting closer with the air mixture screw.
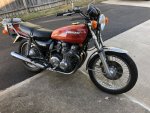
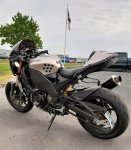
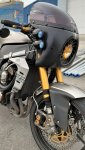
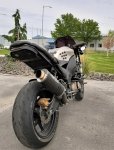
2005 ZX-10 needed a quart of good gas, took several cycles but she fired up and I ran the engine to a good temp.

Rode the C-14 50 miles
 
i being riding for last couple of days, after doing the Christmas with family. It has been in the 60's in middle tn. Merry Christmas everyone! I'm enjoying the 2019 Z900RS
 
'67 CL77 Scrambler...........

Rebuilding the petcock. The tank was pretty much yukked up from having ethanol gas sitting in it, and the petcock was completely clogged up with the MAIN standpipe being split and in terrible shape. The prudent thing to do was just remove it from the petcock body ‘cause there was no point in trying to save it. Fortunately, I was able to get it all out.

After clearing out the clogged ports, I soda blasted the body and am replacing the MAIN standpipe with a piece of 7/32” brass tubing that I’ve turned down one end slightly for an interference fit in its port. After warming up the petcock body, I tapped the new standpipe in place. Badly damaged, I guestimated the old one was about 5 cm long above the mounting surface, and we'll trim this one to that length before installing it in the tank.

Also, replaced the plug wires and caps and did the POR15 treatment on the tank. It was such a nice (relatively) warm day, so figured I'd better take advantage of it while I could. We'll let it cure for the remainder of the week since the temps will be dropping again shortly.

petcock%201-XL.jpg


We're getting there.
 
how did the POR stuff work out for you?, that's what I used on DiRtDaWg...Z bike...
I wa very happy with the results. I hope you saved the "phosphate" pre treat liquid, it's very long lasting, and can be re-used over and over, for treating any steel you intend to paint... I actually still have almost all of the quart bottle I bought in the "kit" to do my tank back in '02 (?), and it still was usable, I soaked some stuff in it a couple months ago, and it etched and coated perfectly, just like when I first used it....
 
I had used it on another tank, so no surprises. Just as messy as ever and hard to keep it from getting on everything. Tank will eventually get painted, so wasn't too worried. I did keep the metal prep stuff.
 
KLR – Ran a couple of errands earlier this morning prepping for our New Years Eve non-event this evening. Wife doesn’t drink, but I have been known to enjoy a beer or three; we’re ready.

CL77 – Pulled the front forks, one side at a time, to replace the deteriorated fork gaiters. Lubed all the cables/adjusted the front brake and clutch. Going to wait a couple more days to allow the POR15 to cure a little more before I mount the tank and add some gas.

Early BMW/? – Finished up the fab process on a couple of brackets for a sidecar windscreen apron. First time I’ve done brazing of any consequence since the late 60’s. Really needed some 1/16” rod, but had to settle on the 1/8” I bought about 6 years ago……  JIC.

The fella I made these for borrowed one from a friend to use as a model for the ones I was making. Original to the right in the below:

Img_5483-XL.jpg


We're done for the day. May start New Years Eve a little early.  :)

To all - Have a safe, happy, and prosperous New Year. Hope to see you at some COG event in 2020.

EDIT: Brackets in use:
Marty%20bib%20brackets-L.jpg


I decided to change the oil on the 75 Z1900 prior to a Patriot Guard Mission to a near by town. I bought $80.00 of heavy duty long johns for the trip. Problem was I put the amount of oil in the book said. Started the bike and the let it sit until the oil had come down from the head. oh boogers, over serviced. This particular bike does like being over serviced. It outs oil in strange places including the air box and air filters are not all that cheap.

So I grabbed my Mity Vac stuck an rubber end on it (I knew better) and got the oil level between the lines in the window. Good enough. So I pulled the plastic hose out ant that stupid  rubber end piece stays in.

Well the bike isn't going on the Patriot Guard mission. Oh Well..I rode in the car the firing Squad was in and fired off some volleys after participating in the flag line.

Pulled the pan. Oops no rubber piece.  Pulled the clutch housing cover.  Ah there it was. The next issue was removing 44 year old OEM gaskets. Those gaskets were by far way more work than they should have been. Dry and hard. These old gaskets didn't care much for any chemicals. Using a razor blade was slow and tedious. 

The Pan and cover are back on and torqued where required. I got the right side exhaust pipes cleaned up a little and  installed. Next is to work on getting the left side exhaust put on.

Another project is getting the wheels and tires back on the Connie with repaired tire pressure sensors.

 
TimR said:
I decided to change the oil on the 75 Z1900 prior to a Patriot Guard Mission to a near by town. I bought $80.00 of heavy duty long johns for the trip. Problem was I put the amount of oil in the book said. Started the bike and the let it sit until the oil had come down from the head. oh boogers, over serviced. This particular bike does like being over serviced. It outs oil in strange places including the air box and air filters are not all that cheap.

So I grabbed my Mity Vac stuck an rubber end on it (I knew better) and got the oil level between the lines in the window. Good enough. So I pulled the plastic hose out ant that stupid  rubber end piece stays in.

Well the bike isn't going on the Patriot Guard mission. Oh Well..I rode in the car the firing Squad was in and fired off some volleys after participating in the flag line.

Pulled the pan. Oops no rubber piece.  Pulled the clutch housing cover.  Ah there it was. The next issue was removing 44 year old OEM gaskets. Those gaskets were by far way more work than they should have been. Dry and hard. These old gaskets didn't care much for any chemicals. Using a razor blade was slow and tedious. 

The Pan and cover are back on and torqued where required. I got the right side exhaust pipes cleaned up a little and  installed. Next is to work on getting the left side exhaust put on.

Another project is getting the wheels and tires back on the Connie with repaired tire pressure sensors.

Good thing you are retired.  ;)
 
Itty bitty six fiddy Versys.

Just ordered up a Terry Adcox seat for it. MAY build, he's a bit busy. I plan on stopping there(Manchester, TN) on the way to Hohenwald for measurements and such. Highly regarded.

I've had a Seat Concepts seat on it but it's just not cutting it after 6-8 hours in the saddle.

If anyone local* with a 650 Versys wants to to trade out for their stock or other seat let me know. I'd like to get $100 for it, exchange. We can meet up for an evaluation, I don't wanna have to $$hip it.

*Local can include the route from FLA to Hohenwald, TN. I also plan on hanging in western NC for a few days on the way back to FL. Probably staying at Kickstands or Suches.


Turned 69k miles on it last weekend.
 
Thanks Dan. Its the one I get stopped on. No performance awards. WHEW. The Connie is still a virgin for getting stopped.....knock on wood.  I got some parts in the mail so I can finish the old 900. I just have to put some heat in the garage. I got some advice from old Kawasaki mechanic on how to squeeze a bit more power out of it.  But it's COLD right now with snow on the way.  Fortunately little wind is forecast.  See you in May.
 
TimR said:
Thanks Dan. Its the one I get stopped on. No performance awards. WHEW. The Connie is still a virgin for getting stopped.....knock on wood.  I got some parts in the mail so I can finish the old 900. I just have to put some heat in the garage. I got some advice from old Kawasaki mechanic on how to squeeze a bit more power out of it.  But it's COLD right now with snow on the way.  Fortunately little wind is forecast.  See you in May.

You do have your Get Out of Jail Free card, right? I believe it's "blue".

Good luck with the fix, Tim. And the weather.
 
from Sunday:

test rode the 2 stroke grom, finally. sorry, no vid of it on the ride but here it is running(below)

extremely linear, smoother than the stock motor due to the counterbalancer which was a nice surprise, and was doing 80 in 5th gear at about half throttle.  :motonoises:  it surprisingly manageable and the gearing is almost too sedate, but it did lift the front in 3rd gear a bit. Not violent power, which was the goal and why there isn't a motocross motor in there. Now for the final dialing in of tuning, between raining ALL THE TIME, of course.

Vid link:  https://youtu.be/gujF4sh9QHI

W BODY WORK OFF BUT POST TEST RIDE #2

grompost-testride.jpg


Got to putting on an adjustable clutch lever on the XR.  While I had it apart I shot
the clutch cable with a bunch of lube and re-lubed the assembly.

IMG_0899_heic-XL.jpg


As we all know....  Having mismatched control levers will cause a drastic pull to one direction,  :hee20hee20hee:
so I put the matching brake lever on.  I couldn't understand why BMW never put on an adjustable lever,
(it's a stretch for a normal sized hand with decent gloves on) until I saw the HP clutch lever option from Beemer for like $250+.

IMG_0900_heic-XL.jpg


These Synto levers came for under $220 for both, are beautifully crafted, and work great.  Most cheaper
or 'universal' levers do not have the piece to actuate the cruise control switches under the clutch lever,
and Cruise Control operation must NOT be interfered with!!  EVER!!
 
Mcfly said:
Got to putting on an adjustable clutch lever on the XR. 

These Synto levers came for under $220 for both, are beautifully crafted, and work great.  Most cheaper
or 'universal' levers do not have the piece to actuate the cruise control switches under the clutch lever,
and Cruise Control operation must NOT be interfered with!!  EVER!!

Bring
More
Wampum

Nice looking levers. I really do like that bike.
 
SteveJ. said:
Mcfly said:
Got to putting on an adjustable clutch lever on the XR. 

These Synto levers came for under $220 for both, are beautifully crafted, and work great.  Most cheaper
or 'universal' levers do not have the piece to actuate the cruise control switches under the clutch lever,
and Cruise Control operation must NOT be interfered with!!  EVER!!

Bring
More
Wampum

Nice looking levers. I really do like that bike.

You don’t even wanna know what the HP footpegs (or seat) go for...  :-\

Bash
My
Wallet

:eek:
 
Mcfly said:
SteveJ. said:
Mcfly said:
Got to putting on an adjustable clutch lever on the XR. 

These Synto levers came for under $220 for both, are beautifully crafted, and work great.  Most cheaper
or 'universal' levers do not have the piece to actuate the cruise control switches under the clutch lever,
and Cruise Control operation must NOT be interfered with!!  EVER!!

Bring
More
Wampum

Nice looking levers. I really do like that bike.

You don’t even wanna know what the HP footpegs (or seat) go for...  :-\

Bash
My
Wallet

:eek:

:beerchug:

 
Toys came yesterday... 

A Givi Side Stand Foot, and some bungee buddies.

I installed the Side Stand Foot, and I must say any
need for a 'puck' is now moot. 

While on the Centerstand, I cleaned the chain, checked chain slack, (ok)
made a 'hose strap' to better secure the chain oiler hose to the frame.
The supplied 3M stick on hose holders have already failed miserably.
Cleaned up the oily mess on the frame and pannier, AND...

Took a ride.... found some soft ground to park on, and the side stand doesn't sink.
Happy, happy.  :great:

Now the decision to keep my side stand puck on the bike (for that guy that can't
find a beer can nearby), or do I toss it in bike part storage?  :017:

IMG_0904_heic-XL.jpg


Tomorrow..... Figure out where to mount the bungee buddies, AND more riding. 
 
’67 Honda CL77 305 Scrambler

Save for stripping the tank’s paint, the bike is essentially ready to roll. Fitted up new fuel lines, all cables lubed and adjusted as is the chain, and all grease fittings given a shot of fresh grease. Also insured and plated (as an antique).

Just trying to decide if I should go ahead and put it on the road to iron out any unknowns, or take care of the tank painting now. If the latter, it would have to be someone who has a heated facility….. meaning $$$ - OR – wait until the weather warms up so I can do it myself.

I may just run it with an aux tank hanging from the bars for now so I can, at least, run it around the neighborhood.

Decisions, decisions………..  :??:

CL77%20LH-XL.jpg


CL77%20RH-XL.jpg


connieklr said:
’67 Honda CL77 305 Scrambler

Save for stripping the tank’s paint, the bike is essentially ready to roll. Fitted up new fuel lines, all cables lubed and adjusted as is the chain, and all grease fittings given a shot of fresh grease. Also insured and plated (as an antique).

Just trying to decide if I should go ahead and put it on the road to iron out any unknowns, or take care of the tank painting now. If the latter, it would have to be someone who has a heated facility….. meaning $$$ - OR – wait until the weather warms up so I can do it myself.

I may just run it with an aux tank hanging from the bars for now so I can, at least, run it around the neighborhood.

Decisions, decisions………..  :??:

CL77%20LH-XL.jpg


CL77%20RH-XL.jpg

Purty.
 
SteveJ. said:
connieklr said:
’67 Honda CL77 305 Scrambler

Save for stripping the tank’s paint, the bike is essentially ready to roll. Fitted up new fuel lines, all cables lubed and adjusted as is the chain, and all grease fittings given a shot of fresh grease. Also insured and plated (as an antique).

Just trying to decide if I should go ahead and put it on the road to iron out any unknowns, or take care of the tank painting now. If the latter, it would have to be someone who has a heated facility….. meaning $$$ - OR – wait until the weather warms up so I can do it myself.

I may just run it with an aux tank hanging from the bars for now so I can, at least, run it around the neighborhood.

Decisions, decisions………..  :??:

Purty.

:13:

Thank you.
 
Finally got the CL out on the road around the neighborhood a few minutes ago, running it on an aux tank. It needs some carb work, but we'll delve into that later. Good to know that all 4 gears, and the clutch work great.

Fella coming over with a KLR that has a problem and he asked that I take a look at it. I got the bike running several years ago after he bought it used, so have no problem trying to help him out now.

IMG_5523-XL.jpg

 
Same bike.

A friend on the 305 Forum was grousing about the difficulty getting the seat on and off the bike since it's normally bolted on at the rear. Kind of a weird arrangement, so ...............

What I did to make it easier (times 2, one for each side):
5/16" clevis pin, head machined down to lower its profile and make it flatter, shortened overall length to accommodate the thickness of the seat mount rubber, drilled new clip pin hole.

Used 8 mm flange head bolts with their heads machined down flat to lower their profile and to provide a better surface to weld the modified clevis pins to.

Welded a clevis and a bolt together, secured in frame with a lock washer and a flange nut. This pinches the rear of the frame to grip the hand rail tight to provide a solid mount for the fender.

Found that I put the hole for the pin a little further up than I like, but shouldn't be an issue. I may drill another hole a little lower once I modify the seat mounting rubbers so the hardware slips up inside slightly.

The system needs a little finesse work to clean it up, but it seems to work fine.

Img_5534-XL.jpg


IMG_5536-XL.jpg


m in sc said:
rode the  250 2 stroke grom to work for the 1st time. Soooo good.

:motonoises:

grom-250-1st-commute-2-4-scaled.jpg


gromcommute-2-4.jpg

So you took it from 8hp on a good day to what, 40/50hp??  I've always considered the Grom a
well dressed moped, then you do this...  You must raise a few eye brows as you zip by!  Awesome!  :great:
 
36 actually. 86 lt250R

the 4v head and big bore on the stock motor i had before was @27hp and needed a wideband (wb2), power commander, 34mm throttle body, and a ridiculous amount of other mods to get that. it was fun, but i had about what i paid for in the bike, in modifications above that. so, somewhere around 7k total. dont care, was super fun to do.

after the rod broke at about 75 mph at the top of 3rd, i sold the head and the clutch cover (had a slipper in it) and bought the lt250 r motor ready to bolt together, had new bore and piston so was an even wash there. then, sold rest and recouped about half what i had in supporting mods.  :great:
 
m in sc said:
36 actually. 86 lt250R

the 4v head and big bore on the stock motor i had before was @27hp and needed a wideband (wb2), power commander, 34mm throttle body, and a ridiculous amount of other mods to get that. it was fun, but i had about what i paid for in the bike, in modifications above that. so, somewhere around 7k total. dont care, was super fun to do.

after the rod broke at about 75 mph at the top of 3rd, i sold the head and the clutch cover (had a slipper in it) and bought the lt250 r motor ready to bolt together, had new bore and piston so was an even wash there. then, sold rest and recouped about half what i had in supporting mods.  :great:

Is 36 the goal? Or does the 250 get some love too?
 
36 is plenty on this, i could get 45 pretty easy out of it if i wanted.. but :eek:.  Its  234? lb bike stock. This motor is quite a bit lighter than the stock 4 stroke motor, so i probably (net) lost about 10 lbs off the bike. (motor is 12-15 lbs lighter, added about 5 lbs in mounts, also dropped a lot of wiring and fuel pump, electric starter, etc). the motor is stock, that's what it makes. I could port it, i have an fmf pipe for it, but its plenty like it is. and, should last a long, long time.
 
CL77 again..........

A good local friend also has a CL and ran a slew of jets over for me to try. I have minimal neighborhood jaunts on the bike  (with the little aux tank) and it has had a severe bogging issue at anything much over 1/2 throttle. The bike has 130 mains in it now, and his collection included some 135 and 140's. I decided to go for the gusto and went with the 140's since the LH carb bowl is kind of pain to get off, and back on.

Anyway, TA-DA!! The 140 jets cured the bogging issue. Even took it up a fairly decent grade in the neighborhood in 2nd. gear, WOT, and no bogging.

Will leave those in there for now, but may back off to the 135's once I get a few more miles on it to see how they do. Even tho' it's not idling perfectly right now, don't think I have to fool with the pilot jets just yet. We'll finesse the tuning a little more and will see as time goes by.

Now, just waiting for VDOT to come by and get rid of a tree across the road that the wind has taken down. Raining it's backside off here for the last day or so, and the wind picked up terribly early this morning. Ground is terribly soggy, and the tree's root ball was no match.
 
Upgraded the S1000XR headlights to LED, hoping throw a little more light down the road.
LED lights are longer than halogens so I got a pair of rubber caps, and modified the OEM covers to
protect the LED lamps.

Lighting is much better, though the LED needed to be adjusted down quite a bit from
the halogen setting to get the cages to stop flashing brights...  at least they see me!  :-[

After dialing in the proper height adjustment, I am pleased with the added light, and
I'm not getting brights flashed at me.  Win win.

Low beam:

IMG_0938_heic-M.jpg


IMG_0942_heic-M.jpg


High Beam:

IMG_0939_heic-M.jpg


IMG_0941_heic-M.jpg


Modified covers:

IMG_0935_heic_A-M.jpg


The bulbs are  30w LED 6500K - 4700 lumen made by Techmax

 
Just got my 650 Versys back from a little warranty work. The clutch return spring had broken. The clutch cover has to come off to replace it.

Gotta love MaKaw's extended warranty. 69,5xx miles on it now and still over a year left of the six year warranty. Still on track to have over 100k miles on the bike and still under warranty, though that seems to be looking a bit iffy with what is going on now.


:beerchug:
 
Replaced front/rear 80/0 tires on the Africa Twin.
Removed forks for replacement of upper fork tubes. Upgrading to ATAS tubes.
 
Put this up on FB, but figured I'd share here too. It's not like we're bored or anything..........

Spent some time while sheltering-in-place to install a new chain on the CL77 that was long enough to accommodate a new rear sprocket. Bike came with a 30T, but trying to ride with it made the bike really “doggy” with no pep. The bike, due to its age, has some other issues as well, and this was just one of them.

Img_5709-XL.jpg


Seems like there are several “standard” rear sprockets listed for this bike depending of which “Official” Honda parts books you’re looking at. A 30T wasn’t one of them for the CL (CB yes). I chose a 40T, which of course, presented another problem: the existing chain wasn’t long enough. Not knowing exactly how many links I was going to need, I got one I knew was going to be too long and cut it to length. And of course, when pulling the wheel to replace the sprocket, I found that one of the mounting tabs for the chain guard was broken – a common problem so it seems. We’ll weld that back in place in due time.

IMG_5697-XL.jpg


In the interim, I’ll start prepping to pull the engine out of the frame. A few of those other issues include a worn cam chain, worn lower chain guide roller, and a worn cam chain tensioner roller. Unfortunately, those require pulling the head and cylinder, which can’t be done with the engine in the frame. Just as bad, the tensioner is an assembly, meaning the roller isn’t available separately. These are almost unobtainum, but I was lucky enough to find one in pretty decent shape. I can take measurements and turn a new roller out of Delrin or some other suitable material if the need arises. The guide roller is also no longer available. Again, I was able to find a decent one and take the necessary measurements so I can make a replacement. I won’t know if I have to pull the cylinder to access this lower roller until after I get the head cap off. That will allow me to peer down through the cam chain channel so I can assess the roller’s condition.

Once a complete gasket set gets here, we’ll get serious and really get to work.

Just part of the joy in trying to keep a vintage machine running. I feel fortunate that I can do most/all of this work myself.

Ya'll stay safe out there.


connie_rider said:
Great progress..

Ride safe, Ted

Yeah, but now it REALLY begins:

IMG_5712-XL.jpg


Tank, carbs, air filters, air filter brackets, tool canister, and pipes all have to be removed yet. The joys of life in these times to try and keep a caged animal entertained.
 
^ that looks like fun. Honda's are a joy to work with.

I rebuilt crank on the 72 suzuki t500 and installing last night. that kickstarter assembly was a huge PIA to get clocked in.

runout: (well within spec)

http://www.2strokeworld.net/wp-content/uploads/72-T500/crank-rebuild/20200307_123901.mp4

that fixture plate is cut ballistic armor, had that made from a previous job. yes, did the rebuild myself

t5c2-scaled-e1585584079907.jpg


while in ther ehad to do the TSB from 1973 regarding the oil dam, had to add 10mm to this 'wall' which controls the oil level to the clutch cover and coverage of 4th and 5th.
prior to welding:

t500-crank-3-29-2012-rotated-e1585584186319.jpg


drying in sun after washdown:


t500-crank-3-29-2011-rotated.jpg


t500-crank-3-29-2017-rotated.jpg


finally got it assembled. late last night.
t500-crank-3-29-2018-rotated.jpg


main reason for rebuild was an internal crank seal had failed. otherwise crank was in spec. in all honesty, i bought a spare crank, rebuilt that out of the bike, then did the swap yesterday.

soon...  :motonoises:


Finally found time to ride my new to me, my 2018 Kawasaki versys 650 on the street today to get a good feel of the bike. Bike was bought new and only rode it in the dealer lot.
Noticed the abs light never goes out. Rode home and started looking at the front tire. Rotation direction arrow points the wrong way.
Looked a little further and found the abs shutter disc on the wrong side of the fork with the pickup.
Dealer installed front tire/wheel backwards on assembly.
Guess I'll fix it myself so it will be right.
 
You guys are my envy and I live through your stories. This winter was my valve inspection year leading to many other "cleaning up" projects. All to take a back seat.
 
Bob said:
Finally found time to ride my new to me, my 2018 Kawasaki versys 650 on the street today to get a good feel of the bike. Bike was bought new and only rode it in the dealer lot.
Noticed the abs light never goes out. Rode home and started looking at the front tire. Rotation direction arrow points the wrong way.
Looked a little further and found the abs shutter disc on the wrong side of the fork with the pickup.
Dealer installed front tire/wheel backwards on assembly.
Guess I'll fix it myself so it will be right.

Nice...not.
 
Did pull the CL engine yesterday going through the various maneuvers and language vocabulary I’m good for at times like this. Finally got the position of my tongue just right and finagled the engine out of the frame, onto the lift, then transferred it to the wooden topped cart that’s a little taller and easier for me to work on. It’s also not as slick and makes for a more stable work platform.

IMG_5748-XL.jpg


Pulled the cap and found that the cam timing was good, but also found that who ever had it apart previously had the master link circlip installed in the wrong position for direction of rotation. Hate it when I find stupid "stuff" like that. Makes you wonder what else may be amiss in there. I had pulled the tensioner out a day before and saw that it's roller was in pretty good shape. Once I Was able to get a somewhat “clear” view of the lower roller, it looks fine too. Relieved that I don’t have to pull the cylinder – but – hope no leaks will crop up once everything is reassembled and torqued up tight. The chain is definitely worn based on the lag in the cam timing, so we'll replace it today, button things back up, and maybe get the heavy critter back in the frame.

Direction of cam is CCW in this view:
IMG_5756-XL.jpg


Lower chain guide roller:
IMG_5772-XL.jpg


Ready to get a new chain installed and buttoned up:
IMG_5773-XL.jpg


m in sc said:
^ that looks like fun. Honda's are a joy to work with.

I rebuilt crank on the 72 suzuki t500 and installing last night. that kickstarter assembly was a huge PIA to get clocked in.

main reason for rebuild was an internal crank seal had failed. otherwise crank was in spec. in all honesty, i bought a spare crank, rebuilt that out of the bike, then did the swap yesterday.

soon...  :motonoises:

Good job.

Rebuilt a bunch of single's cranks back when I was in the Kaw bike shop, but no twins, or triples; didn't really have the tooling for the latter. On a whim, I considered doing singles here, but never found the time to collect the holding fixtures/plates together. Then the imbalance "stuff" kicked in ..........
 
Bob, nice on the top-end. a clip link? thats awesome. last honda twin head i did was on a 68 450, with the torsion bar rocker setup and a rivet link, that was the WORST. Thats awesome you have a clip master on there.  :great:

regarding the cranks, the 1st one i ever did was a triple crank, on an S2. I never found it difficult, just time consuming. v blocks and multiple dial gauges and a lathe made it a lot easier. (the lathe with a live center for holding)

the T500 crank would have cost me $650-750 to rebuild, which is fine, but I saved about 550 of that doing it myself. (and i have bragging rights... lol).


m in sc said:
Bob, nice on the top-end. a clip link? thats awesome. last honda twin head i did was on a 68 450, with the torsion bar rocker setup and a rivet link, that was the WORST. Thats awesome you have a clip master on there.  :great:

regarding the cranks, the 1st one i ever did was a triple crank, on an S2. I never found it difficult, just time consuming. v blocks and multiple dial gauges and a lathe made it a lot easier. (the lathe with a live center for holding)

the T500 crank would have cost me $650-750 to rebuild, which is fine, but I saved about 550 of that doing it myself. (and i have bragging rights... lol).

Bragging rights, well deserved - but - you can call me Ray, or you can call me Jay, but don't call me Bob.  ;D

The name is Guy.  :)
 
A couple of pretty awesome projects. Thanks for posting up.

2 smokes are especially cool. I had a '72 Water Buffalo that I bought brand new and toured with it.

Ringa ding ding...

:beerchug:
 
Mine has been derailed momentarily. I’d ordered a replacement cam chain (w/master link) from the same fella I ordered one from in 2015 when working on the WV Survivor CL77. That one came in with a clip-type link. This recent one came in endless and you had to break it; okay with that. I had assumed that the link was the same as before. But no. The provided master link was the type where the pins need to be swaged. Of course, with this smaller type chain you need a special swaging tool that has the appropriate sized anvils to do the job. I don’t have one, and not going to get one for a one-off job. The chain will be going back since stand alone clip-type master links in this size are getting pretty scarce.

Unfortunately, like the master links, the cam chains themselves for these vintage bikes are no longer available from Honda. They’re also getting pretty scarce in the aftermarket too. Fortunately, I did find one from a fella up  in OH that deals in a lot of NOS for vintage Hondas. It is the same type I got a few years ago from another restoration parts vendor.

So, we wait. In the interim, may tackle welding the chain guard tab back in place.

Ain’t we got fun?
 
Given the sparse traffic on the roads these days, and my
job being considered a 'critical service' the XR has gone full
time commuter for the forseeable future.  ;D

Oh no.... don't worry about little ol' me, I'll drudge through it...


@ Guy:

ive done that before. I'm not proud, but it works.  Is it a #200 chain or another size? if so, you can buy industrial chain, that works as well. Used in machine building pretty regularly. Honda never manufactured chain, they bought it so...


https://www.mcmaster.com/roller-chain
 
m in sc said:
@ Guy:

ive done that before. I'm not proud, but it works.  Is it a #200 chain or another size? if so, you can buy industrial chain, that works as well. Used in machine building pretty regularly. Honda never manufactured chain, they bought it so...


https://www.mcmaster.com/roller-chain

I know they didn't, and used approved vendors when they outsourced stuff.... like the majority of manufacturers today. This is #219 or 219H Metric roller chain, and it's out there. I believe it's also called 05B, or 8mm chain, but haven't found a direct cross reference with the numbers yet. Fortunately, I found exactly what I'd used the last time. Rather than take a chance with the unknown, went with the given.

305%20cam%20chain%20001-L.jpg


and I'm finally done. better than ever. motor smooth as glass. (well for a 500 twin)

sorry about the sound? not sure, but it wasn't very long so you didn't miss much.

:beerchug:


Attachments

  • 91601482_3306932196001817_6173706581067169792_o.jpg
    91601482_3306932196001817_6173706581067169792_o.jpg
    116.7 KB · Views: 146
m in sc said:
and I'm finally done. better than ever. motor smooth as glass. (well for a 500 twin)

sorry about the sound? not sure, but it wasn't very long so you didn't miss much.

:beerchug:

Have fun with that ring dinger.
 
m in sc said:
and I'm finally done. better than ever. motor smooth as glass. (well for a 500 twin)

sorry about the sound? not sure, but it wasn't very long so you didn't miss much.

:beerchug:
Very cool Mark! :motonoises: :motonoises:
 
Charged up the battery for the BMW, looked at it when I walked past it getting some tools, will try to get it out this coming week.
 
Good on ya!
Gold one!
My first a 68 was blue when I was a sailor in San Diego in early '70's.  My brother Chris and wife Linda had a baby and he needed to sell it so shipped it to me from MT.
1998 about got a '70 and ran intermittently on one cyl. Changed coils but didn't help. Probably need new wiring? COGer Idaho Bob had it next.
Last year got the '72 from KY and in good condition.
I read in early reviews that the T 500 vibrated so much at higher rpm (7K redline) that the passengers feet vibrated off the pegs. LOL.
I don't recall as a 20 something that the vibration bothered me.
Now as a senior citizen ... man does this thing vibrate.
I rode it in a couple group rides last year, other clubs, VME and VJMC. Plus solo rides. One club ride was 130 miles and I was done! Wore me out. I love the T500 tho.
 
not bad with a fresh crank. had my GF on the back yesterday for about an hour and a half, no problems. it is buzzy for sure, but not bad.
 
My baby.
1978 KZ 650B - 22k miles
1. Replaced a dead battery.
2. Wiped her down with some cleaner / polish.
3. Filled the tank with fresh gas.
Took a ride thru around town..First ride of the year.
It was nice day here in South Eastern Ohio.
Stay safe.
ONOBob
 

Attachments

  • 59183188893__CCBF3F81-57D9-4123-987A-69C8CFE4E5D6.JPG
    59183188893__CCBF3F81-57D9-4123-987A-69C8CFE4E5D6.JPG
    138.3 KB · Views: 143
Installed a new cam chain in the CL yesterday. Hope to get it buttoned up today, and possibly stuck back in the frame.

Tensioner before new chain:
IMG_5802-XL.jpg


After new chain:
IMG_5806-XL.jpg


Master link clip pointed in correct direction new:
IMG_5805-XL.jpg


Yeah well, the best laid plans don't always work out.

As mentioned, the new cam chain was installed yesterday. Today, replaced the cap and torqued things in place. Checked point(s) gap, and set the timing using my ohmmeter on the 1 ohm scale (with a tone indicating continuity), and the points backing plate wound up where I was hoping/expecting it to be - right in the center of travel. It was – almost dead nuts.

Img_5809-L.jpg


Thought I was ready to stuff the engine back in the frame, but decided to give it one final look-over before doing that and found a bunch of oil collected around the head/cylinder joint in the front of the chain tower.

IMG_5808-L.jpg


Poo!

Had hoped to shortcut this little adventure without having to pull the head and/or cylinder – guess not. Have done it a number of times before on other bikes with no problems, but not this time. Glad I found it now and not after things were put back in the frame.

I have all the gaskets for the job, but still somewhat disappointing. On the plus side, it allows me to see exactly what’s in there as far as pistons (std., oversize, etc.) and the like, or just screw-ups by one of the POs. Plenty of time since I'm not going anywhere.


During the transition from cart to lift, then back to the cart, one tends to find out that some of the cooling fins are a little sharp. At approximately 115 pounds, the engine is a robust collection of cast, machined steel, and aluminum whose shape makes it a little unwieldy.

So, something like this is not to be unexpected.

Img_5815-L.jpg


As I've said before - if I don't bleed at least once out here, I ain't doin' nuttin'.  :great:

 
connie_rider said:
Oucheeee..

Ride safe, Ted

115 lbs. isn’t all that bad IF you can get directly over it, but when trying to maneuver it between two different levels when that bulky mass is out in front of you, it can be somewhat of a challenge. I probably could have avoided that little oops if I’d had on a long-sleeved shirt, or a pair of one of my coveralls. It was just a nice warm day and I was trying to take advantage of it.

Live and learn.

Probably not.............
 
I changed the TPMS sensor in my BMW F800GT.

The sensor from BMW lists for $230.  I've heard that there's a couple hundred in labor, so if you take it to the dealership to change, it can easily cost @$500.

I found a sensor on Amazon for $38.  https://www.amazon.com/gp/product/B07DDGYMYJ/ref=ppx_yo_dt_b_asin_title_o01_s00?ie=UTF8&psc=1  It wasn't the most expensive, nor the least expensive, but at least it said Schrader on it like the OEM sensor and had good reviews.

From what I had read, I probably needed a tool to "wake up" the sensor.  I ended up buying the JDIAG 2IN1 TPMS Relearn Tool Super EL50448 for GM and Ford Tire Pressure Monitor Sensor TPMS Reset Tool 2020 Edition for $16.  https://www.amazon.com/gp/product/B076KL82JP/ref=ppx_yo_dt_b_asin_title_o00_s00?ie=UTF8&psc=1  Some of the tools I've read others used, cost hundreds of $$$, simply because they said they'd work on BMWs.

I pulled the front wheel and broke the bead off the tire enough to get to the sensor, changed it and then used the tool to wake up the sensor, and a GS-911 to have it talk to the bike itself.  It worked like a charm.

So for about $55, I got it working again.


FWIW, it seems that TPMS sensors transmit on only a couple frequencies that even these inexpensive TPMS reset tools can work.  So it doesn't seem like there is a "BMW" frequency or a "Toyota" frequency, or a Kawasaki frequency. 

Chris
 
put twin headlamps on 'pigpen' the theft recovery '14 650 gladius. what a mess this thing is. stolen for 2 years, recovered, sat another year, then I got if from my buddy because he was tired of looking at it. :motonoises:


Attachments

  • 20200411_172128.jpg
    20200411_172128.jpg
    325.5 KB · Views: 132
Kind of a run down on where we are with the CL engine. If anything, just another test of my patience during this trying time. Grab a bag of popcorn and enjoy(?).

From the top:

When adjusting the timing, it became apparent that the cam timing was lagging the crank; the points backing plate was at the far extreme limit of its travel. In addition, the chain tensioner seemed to be at the limit of its forward travel as well. Clearly, the cam chain was worn and needed to be replaced.

Finally bit the bullet and pulled the engine…..  going through the various maneuvers and language expletives I’m good for at times like this. Finally got the position of my tongue just right and got it finagled out of the frame and onto the lift. Once the lift was raised, transferred it to a wooden topped cart that’s a little taller and easier for me to work on. It’s also not as slick and makes for a more stable work platform.

Pulled the cap off the top of the engine and found that the cam timing was good, but also found that who ever had it apart previously had the master link circlip installed in the wrong position for direction of rotation. Was also able to get a somewhat “clear” view of the lower roller and it looked fine. Relieved that I don’t have to pull the cylinder – but – hope no leaks will crop up once everything is reassembled and torqued up tight.

New cam chain installed, replaced the head cap and torqued things in place. Checked point(s) gap, and set the timing using my ohmmeter on the 1 ohm scale (with a tone indicating continuity), and the points backing plate wound up where I was hoping/expecting it to be, right in the center of travel. It was – almost dead nuts.

Thought I was ready to stuff the engine back in the frame, but decided to give it one final look-over before doing that and found a bunch of oil collected around the head/cylinder joint in the front of the chain tower.

Poo!

Had hoped to shortcut this little adventure without having to pull the head and/or cylinder – guess not. Have done it a number of times before on other bikes with no problems, but not this time. Glad I found it now and not after things had been put back in the frame.

I have all the gaskets for a job I was hoping to avoid, no way around it. On the plus side, it allows me to see exactly what’s in there as far as pistons (std., oversize, etc.) and the like.

So, looks like the head needs to come off, which I did so I could replace the head gasket. When cleaning things up I found that one of the %#@& owners had used some type of glue/adhesive to bond two gaskets that straddle an oil baffle (plate) that sits on top of the head. It’s designed to allow crankcase pressure to escape to atmosphere (remember when this bike was made). Have no idea why they thought that the bonding was necessary, but there it was. Took some heat from a torch to finally get the gaskets free from the baffle plate so they could be removed.

Once the head was off, I found that the cylinders/pistons are the first oversize (0.025”). This really has me wondering just how accurate/truthful the ODO (and title) mileage is for this bike. I know my own ’67 back in the late 60’s had well over 60K on it when I sold it, and never used a drop of oil; it was bone stock. There is just a hint of cross hatching still evident on the cylinder walls, so the top-end rebuild must have been done not too long ago, mileage-wise, from what the ODO is saying – if – you can believe it.

And of course, as the engine is sitting on the cart with the head off, I’m seeing a slight weep of oil appearing around the periphery of the cylinder/crankcase seam. But can I rock the cylinder back and forth so I can pull it off too? Hell no. The dumb - (serious expletive language here) have used their adhesive to bond things in place. A couple of whacks with my ancient (from the 70’s) dead-blow hammer in a couple of places only resulted in the hammer head coming apart further; cylinder didn’t budge. I was “upset,” so I stopped. New dead-blow hammer is on order.

New day, and gave the engine a fresh look to make sure I was actually seeing oil weeping around the joint. Even hit it was a shot of Brakleen and blew it dry with an air nozzle. After a couple of hours, the oil’s sheen reappeared. I was going to wait until the new hammer arrived next week, but decided to try another scheme. Found a couple of places in the front of the cylinder solid enough to where I could put one end of an oak 2x3 on its underside, and strike the other end in an upward direction with a hefty brass hammer. Wanted to go front-to-rear (or visa-versa) since that’s the natural way the pistons rock on their connecting rods should it break free. Two healthy whacks on either side of the front had me seeing more oil coming from the joint. I stopped with the hammer and could now rock the cylinder back and forth by hand; it was basically free. I stopped for the day and the cylinder will be pulled tomorrow (Happy Easter!). Just not in the mood today to try and figure out the best approach for removing the base gasket from wherever it’s mainly stuck to – the cylinder, or the crankcase. Once the gasket is off, I’ll hit the bores with a hone to liven up the cross-hatching, then start piecing it back together.

Today I pulled the cylinder and found most of the gasket bonded to the underside of it with the same stuff they used to bond the head baffle plate to the engine cap. Holy crap, what in Hades was this moron thinking? Also found that one of the alignment dowels was missing. Who ever had this thing apart previously really screwed the pooch, which really pi$$es me off.  Found that those dowels are not referenced anywhere I have found (yet) in any of the parts books. These are hollow and I could make one, but found that McMaster-Carr had some solid versions, so went ahead and ordered a couple of them longer than necessary - JIC. No reason I can see that these need to be hollow, so they should work just fine. Also found that the screws holding the lower cam chain guide roller weren’t as tight as they should have been. Found the same thing on the WV survivor I worked on a few years ago. Will use Blue Locktite on the threads during re-assembly.

See some very light scuffing on the pistons in a couple of places (bores look fine), so they should be okay. Will continue to work on getting the gasket off while waiting for the dowels to come in.

Easter Monday: " Low and behold, I did find the dowels referenced in an ancient General Export parts book for the CB72; different bike but same basic engine. They were listed as a 10x16 knock pin, but the part number was superseded to another and the part is now being shown as a 10x14 knock pin. Partzilla had them, so I cancelled the McMaster order after I put one in with Partzilla to make sure they had them in stock. At least I won't have to make my own now.

Continued to work on getting the glued cylinder base gasket free from the cylinder base and upper crankcase gasket surface. Scrape to rough up the gasket surface, then allowed it to sit in a container filled with parts cleaner to slightly soften the gasket, scrape and repeat. This process started yesterday, and today, I FINALLY got all the material (and unknown goop) free of the upper crankcase and mating surface of the cylinder. Just waiting for the dowels to come in now, but in the interim, will hit the cylinder bores with a couple of passes with a hone to perk up the cross-hatching.

Today, after plugging up an oil galley in the cylinder, I hit the gasket surface with the bead blaster so the dry gasket would adhere to it a little better; no goop included. I’ll run the hone through the cylinders a little later.

While waiting for the dowel(s), a friend contacted me about making another BMW tool – for clutch alignment. Fortunately, I have the material so will lay it out and fire up the lathe. Anything to stay busy during this crazy time.

clutch%20tool-XL.jpg


Fired up ACAD, made a quicky drawing, and sent it to him so he could add in the dimensions. It ain't pretty, but it worked.  :)

EDIT: Cleaned up the drawing and added the dimensions:
alignment%20tool-L.jpg

 
few more pics of 'pigpen'

new tire on front today so i can do a reasonably safe test ride later.

14-sv_initial-work_4.jpg


14-sv_initial-work_3.jpg


this things -mint-  :D

14-sv_initial-work_5.jpg


No not mint, minty! :D  I guess that bald front tire goes with the "risky ray" mentality of folks that don't mind risking some jail time for some ride time :motonoises: :motonoises:!
 
connieklr said:
While waiting for the dowel(s), a friend contacted me about making another BMW tool – for clutch alignment. Fortunately, I have the material so will lay it out and fire up the lathe. Anything to stay busy during this crazy time.

clutch%20tool-XL.jpg


Fired up ACAD, made a quicky drawing, and sent it to him so he could add in the dimensions. It ain't pretty, but it worked.  :)

EDIT: Cleaned up the drawing and added the dimensions:
alignment%20tool-L.jpg

I ain't no machinist, and this certainly shows it, but I hope it works for him:

Img_5860-XL.jpg

 
got locally recovered/refoamed seat on the 70 R5 today. there are NO good aftermarket sources even close to correct. very happy about the result. All hand done, even made  vinyl template to paint the logo on the rear.  :beerchug:


r5seat-new_2.jpg


r5seat-new_4.jpg


r5seat-new_3.jpg


bike is an early one, serial no 2000, was actually built in '69. Just has a few weird nuances to it. I ride this bike a LOT.

note in the background the gladius. new shoes all around and lots of service work done. rode to work friday.  :beerchug:

20200424_164503.jpg


I rode it!  Better part of 120 miles.  I really needed it too.
Took a leisurely ride though the country from Cocoa to Palm Bay
staying away from the interstate.  Spring is definitely here,
as the little buggers are out in full force, including those nasty
little love bugs.

The S1000XR once again proved herself a worthy steed, as I
caught up to a couple of Ducatis on SR441, and kept up with them
for (for the most part) several miles before they peeled off for gas... 
Those boys ride fast.  Then eased back into cruisin' mode for the
jaunt back.

As the Guv-Na of Florida is planning to re-open parts of Florida on
May 1st, I decided to take advantage of the "Open roads" before
the congestion crept back out.
 
Last night made a replacement damper for my instrument cluster on the ZX-10 Nekkid. The first one blew or bounced out somewhere on the 120 mile trip 2 weekend ago. I just looked down and the gauges was jiggling like Jello again. So cut it larger, shoved it in further...and test rode to work on my one day in this week. Some rough roads and one small whoolie and it is as stable and cushy as you please!!
 

Attachments

  • 20200429_122109.jpg
    20200429_122109.jpg
    346 KB · Views: 171
  • 20200429_122059small.jpg
    20200429_122059small.jpg
    323.5 KB · Views: 148
  • 20200429_122040small.jpg
    20200429_122040small.jpg
    271.9 KB · Views: 140
  • 20200429_122026.jpg
    20200429_122026.jpg
    343.8 KB · Views: 144
Thanks..yeah, you DO NOT want me to have to activate Hello Kitty.....cuz then it is Goodbye World!
 
Project for the last couple of days, turn a slug of this 1.5” dia. steel rod, into a ~1.375” spanner socket to fit the spanner nut on the end of vintage Honda 250/305 engine cranks…… and possibly others.

Img_5977-XL.jpg


Hanson%20pix1-XL.jpg


IMG_5974-XL.jpg


I really didn’t need it, but another local asked last week if I had one. I didn’t, but he did a really nice job whacking up a socket that would fit. I did the same for a different sized spanner nut back in the late 60’s, but my effort was horrible looking, but it worked. I borrowed a side grinder to make mine. His question kind of inspired me to take a whack at it. I had the material, and obviously the time. I have to training or any practical experience as a machinist, just basically learning as I go. Regardless, away we went.

With exception of the lathe work, most of the pix can be seen HERE:https://gbyoung2.smugmug.com/Other/Spanner-Socket

EDIT: Main gallery moved to: https://gbyoung2.smugmug.com/Motorcycle-Repair/Spanner-Socket

EDIT: I guess everyone is entitled to a brain poot every now and again. I remembered a more stable platform scheme I’d used previously – after – the fact (of course) for this project. I removed the chuck’s spindle adapter plate so the entire back surface of the chuck was in contact with the rotary table’s surface. Used it a number of years ago when modifying an ultrasonic welder adapter for work.

fixture-XL.jpg


Ultrasonic%20welder%20holder%20002-XL.jpg


Only real difference is the size of the step blocks for the clamps due to the dimension difference rotary of the table's T-slot nuts.

Testing it out on some minor clean up of the socket I did back in the 60's:
Img_5985-XL.jpg


Yeah, we muddle along but always seem to get the job done (usually)… hopefully learning along the way.    :great:
 
nice work!

i have a '64 atlas lathe and a pre war era p&w mill at home .. it makes things so much easier.  :great:

I took a  ride on the 250 2 stroke grom , did about 2 hours on it on a group ride. man that things fun. Surprised the guy on the scrambler when i passed him at 85 on  one stretch of the ride when he decided to blow past the leader of the ride. (all in good fun).  :D

20200503_141908.jpg
 
it was the 1st 'public' ride so to speak. i got quite a few 'man, that thing runs good' comments, and a few confused looks.

as an fyi, the ride was LED by a hopped up 200cc vespa. so we maintained 60 ish most of the time.
 
I've added some Hepco & Becker c bow soft saddle bags to my 2019 z900rs to make it a little more tour friendly.
 

Attachments

  • cbow bags resize.jpg
    cbow bags resize.jpg
    247.1 KB · Views: 136
  • may19resize.jpg
    may19resize.jpg
    281 KB · Views: 143
  • reloadedrsize1.jpg
    reloadedrsize1.jpg
    235.1 KB · Views: 128
Installed a C14 rear shock with the stock rocker and linkage.  Did some cleaning and paint work on the swing arm, center stand and kick stand.  Installed an 06 final drive with 9,000 miles to solve leaking problem.  Installed mufflers from a 99 to replace some not so perty 87 cans.
 

Attachments

  • 20200512_104555_HDR.jpg
    20200512_104555_HDR.jpg
    297.2 KB · Views: 134
Removed lowering rocker? That picture makes rear tire look tiny because of the clearance between tire and fender.

Ride safe, Ted
 
Top